How to Get Started on Twitch in 2022
The streaming industry has taken the world by storm, with Facebook gaming growing by 75% in the past year and YouTube live stream by 45%. And if we are talking about live-streaming, we cannot forget about Twitch. The game-first platform alone hosts 4.5 million streamers.
Today streamers are considered no different than other social media creators. A Twitch influencer marketing agency like GryNow frequently works with popular twitch streamers to promote their clients' business.
A brand that wants to capitalize on the popularity of streamers can avail the services of a Top Influencer Marketing Platform in India .
What, primarily started as a gaming platform, has blown and expanded into other genres. Audiences' increased interest in education and vlogging content has invited creators from different niches to set up a channel on Twitch. Today the gameplay streaming platform is no longer limited to playing Dota, Fortnite, Rocket League, battlefield, or counter strike - creators have the freedom to do much more.
We have put together a guide that will provide you everything you need to stream on Twitch. Do you want to know how to get started on Twitch? What hardware do you need? Or how can you set up your stream on your computer or console? - We got you covered.
If you want to know Twitch in depth – here’s the link where you can explore more what is Twitch ?
A Quick Guide to Starting a Twitch Channel
Create A Twitch Account
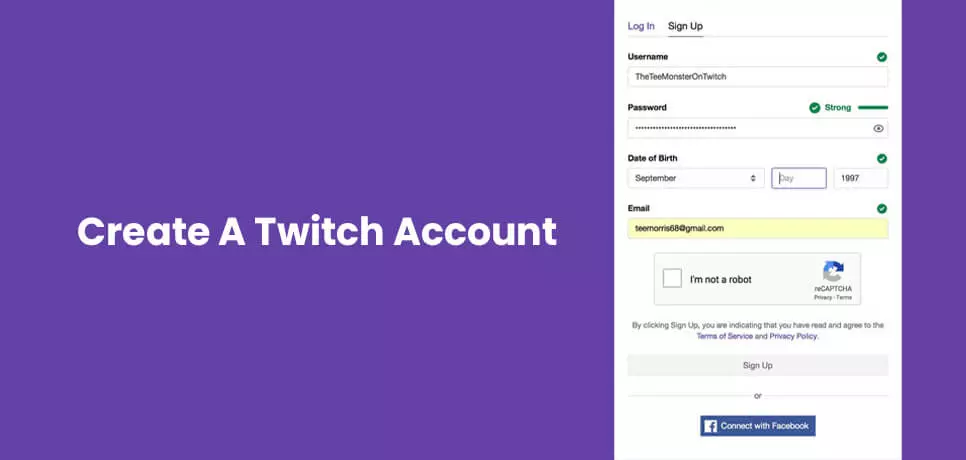
First, you need to create a twitch account to proceed further if you haven't already.
On the desktop, you can create one by pressing the signup link and filling in the form with the required details.
For mobile uses; you have to install the official twitch mobile application on your devices - you can find it on the Apple store for iOS and play store for Android.
Understand Community Guidelines and Terms of Service
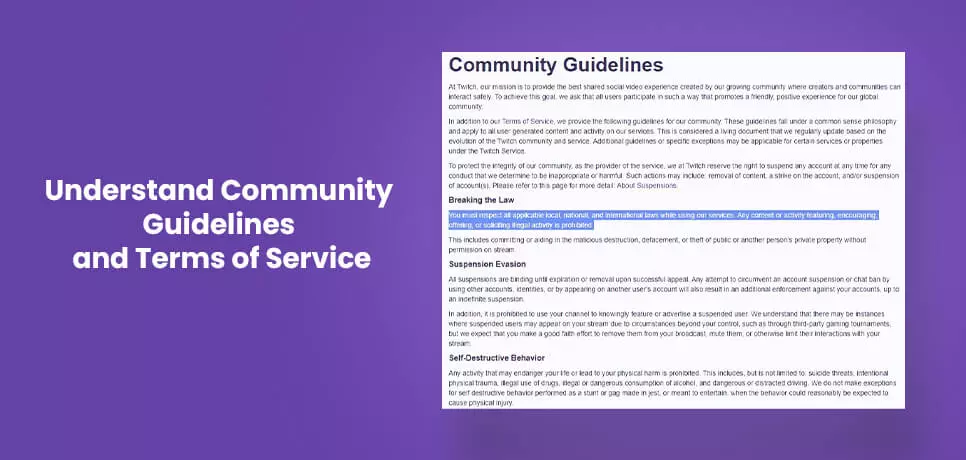
Under normal circumstances, I would advise you to review Twitch's official site before setting Twitch. But the words used can be a little tricky to grasp. So the least you can do is read the community guidelines before you take it further.
It will be helpful to visit the page occasionally to check on updates from the platform on their policies and terms of use.
Enable Two-Factor Authentication
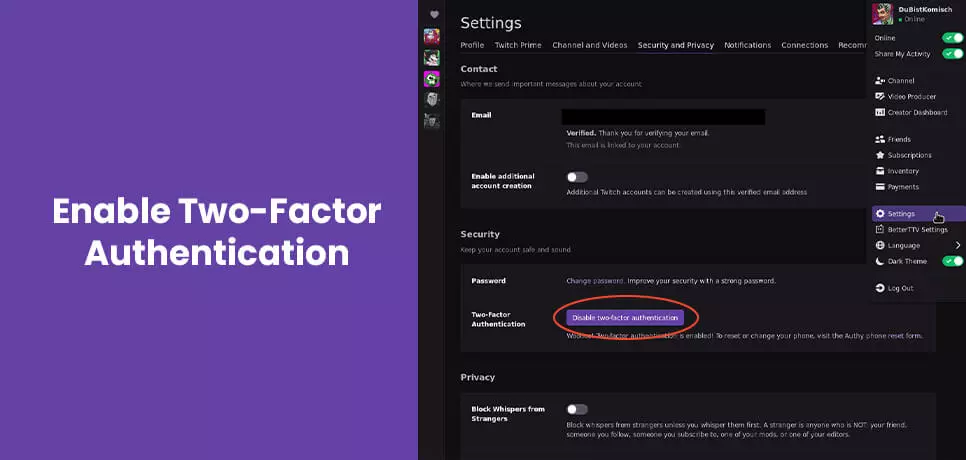
This may come as a surprise, but you cannot set up a twitch stream without enabling two-factor authentication. To add to your troubles, enabling two-factor authentication is not possible on mobile devices.
You need to head over to your desktop and sign in to your channel.
Step 1: Log in to your twitch channel.
Step 2: Go to security settings
Step 3: Enable 2FA
Now, come back to your mobile device and complete the two-factor authentication process.
Optimize Your Channel For Your Audience
Twitch, like any other video streaming platform, offers streamers the ability to customize their channel.
You can add a bio describing yourself or your channel update. You can also add a profile photo or update an existing one via your mobile phone.
Have A Good Twitch Gaming Setup
A streamer is as good as the hardware he uses to broadcast their gameplay. Hence, we have included a section to tell you about the necessary hardware you require to stream your audio and video in this article.
Select A Broadcasting Software
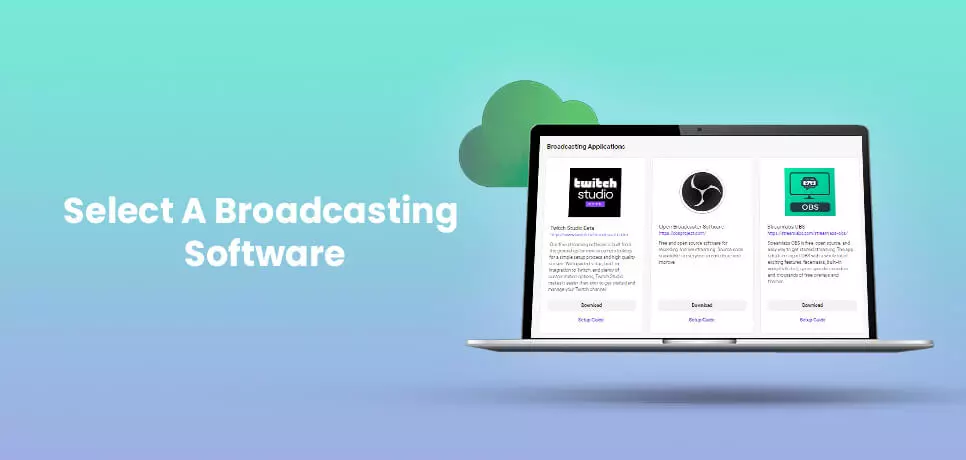
Your gameplay has to be seen by your viewers in real-time. For that, you need broadcasting software like OBC or twitch studio. The former has a steep learning curve and can take time getting used to - especially when you are just getting started on Twitch. On the other hand, a later is developed for streamers who lack much technical know-how.
OBS Studio is backed by a big community, who can assist you with plugins, support other effects.
Twitch studio automatically detects your hardware. The pre-installed themes help streamers customize the look of their stream elements for Twitch. The software has an inbuilt chat, feedback, and alert mechanisms that help you monitor your account activity and communicate with your audience
Ultimately, the one you select will depend on your zeal to learn, expertise, and necessities as a video creator.
How To Start Streaming on Twitch
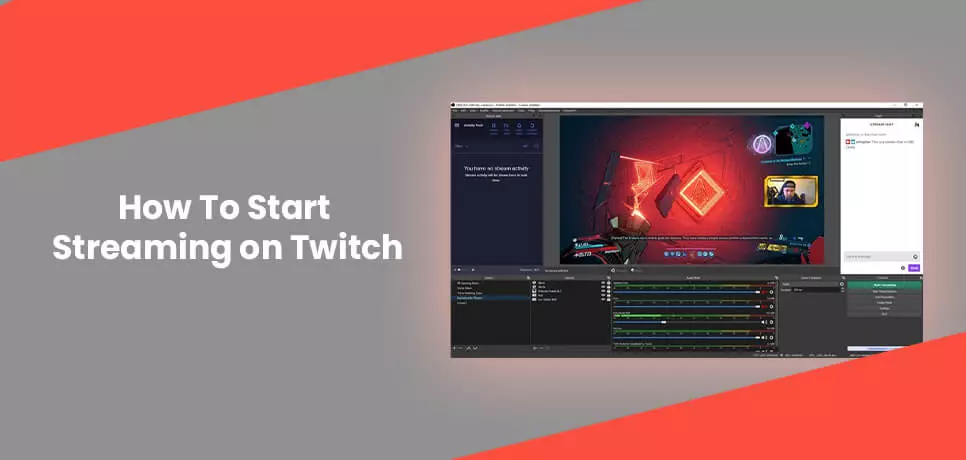
Twitch for Windows / Mac OS
The following steps will guide you to stream live on this platform using open broadcaster software (OBS) studio on Windows and Mac OS.
Step 1: Open OBS studio and press settings on the bottom right corner of your screen.
Step 2: On the settings dashboard, click 'Stream' on the left column
Step 3: For your service, select 'Twitch'
Step 4: Press the 'Connect Account' button
Step 5: Insert your twitch channels login details.
Step 6: Press 'Apply' to finish the process.
Configure Your OBS Studio
Step 1: Open OBS Studio and press 'Settings' on the bottom right corner of your screen.
Step 2: Select the 'Video' option available in the left column.
Step 3: Define your base and output resolution
Step 4: Hit 'Apply.'
Step 5: Press output on the left column
Step 6: Below the streaming section, select video bitrate
Step 7: Select and encoder
Step 8: Click 'Audio' on the left
Step 9: Under 'Global Audio Devices,' select the correct source for Mic/Auxiliary Audio.
Step 10: Press 'Apply.'
Produce Your Scene
Step 1: Below the scenes on the bottom left corner press the 'Plus' icon.
Step 2: Insert a name and press 'OK.
Step 3 Below 'Sources' tap the Plus icon.
Step 4: Choose 'Game Capture' from the pop-up window.
Step 5: Insert a name and press 'OK.
Step 6: On the properties panel, select 'Mode' and enable the stream element for Twitch you want. Tap OK when you are done.
Step 7: Below 'Sources,' tap the 'Plus' icon.
Step 8: Choose 'Video Capture Device' from the pop-up window.
Step 9: Insert the name of your webcam and press OK.
Step 10: In the Properties panel, choose the suitable device, configure settings as required, and press OK.
Insert Twitch Chat
Step 1: Sign in to the platform on your desktop browser impress your profile icon.
Step 2: Choose 'Channel' from the drop-down menu
Step 3: Press 'Chat'.
Step 4: Press the 'Cog' icon on the bottom right corner
Step 5: Press 'Popout Chat' from the pop-up window.
Step 6: Copy the link.
Step 7: Navigate to the OBS studio and press 'View.'
Step 8: Press Docks, followed by Custom Browser Docks.
Step 9: Insert a name, paste the link, and press Apply.
Twitch for Xbox
You need to install the twitch app to stream your gameplay.
The entire process is divided into two parts.
- First, you need to configure settings on your Xbox.
- Next, you have to download and sign in to the Twitch app and adjust your session configuration before you can broadcast.
Set Your Gaming Console
Step 1: Click the X button on the controller and choose 'Settings.'
Step 2: Choose your 'Account.'
Step 3: Press privacy and online safety.
Step 4: Choose Xbox privacy
Step 5: Choose view details and customize.
Step 6: Choose 'Game Content'.
Step 7: Below broadcasts gameplay, confirm that the setting shows 'Allow.'
Step 8: Below, click "You can share content made using a connected camera." Confirm that the setting shows 'Allow.'
Step 9: Click the 'B button' to navigate back to the earlier screen and press online Online Status & History.
Step 10: Below, "Others can see if you're online." Confirm that the settings show 'Everybody.'
Set Up Twitch
Step 1: Go to the Microsoft Store and install the twitch app.
Step 2: Log in to your account.
Step 3: Navigate to Twitch.tv/activate on your desktop and insert the six-digit code to find on your screen.
Step 4: Inside out twitch app, select the "Broadcast" tab.
Step 5: Select the video options.
Step 6: Select a title for your broadcast.
Step 7: Insert your camera and microphone details.
Start And Conclude Your Twitter Private Live Stream
Step 1: Navigate to the Twitch app and press 'Start Streaming.'
Step 2: Click the X button to start the gameplay you want to stream.
Step 3: Click the X button to reopen Twitch and click stop streaming to conclude the session.
Twitch for PlayStation
Unlike Xbox, Sony PlayStation does not require you to install an app.
All you need to do is link your console to your twitch account, and you are ready to start streaming on Twitch.
Ready Your PlayStation Console
Step 1: Click the 'Settings' icon.
Step 2: Navigate down and click 'System.'
Step 3: Next, to 'enable HDCP,' clear the box.
Step 4: Navigate to the main settings screen and click 'Account Management’.
Step 5: Click 'Link With Other Services'.
Step 6: Choose 'Twitch' from the options available.
Step 7: Navigate to Twitch.tv/activate and insert the six-digit code you find on your screen.
Start Streaming On Twitch
Step 1: Proceed to play the game you want to stream.
Step 2: Click the share button on your control
Step 3: Choose broadcast gameplay
Step 4: On a broadcast gameplay panel, check on the box beside each setting to enable or disable the following options
Include video from the PlayStation camera in the broadcast.
Include microphone audio in the broadcast.
Display message to spectators and spectators’ comments.
Step 5: Provide a title for the broadcast.
Step 6: Define the quality of your output.
Step 7: Choose 'Start Broadcasting' to proceed.
Step 8: Click on 'share.'
Step 9: Press on 'broadcaster settings.'
Step 10: Click 'stop broadcasting' to end your live stream.
Things You Need to Stream on Twitch
Good Quality Microphone

If you want to achieve a professional level in your live streams, you need to invest in a microphone. The capabilities of an inbuilt laptop or webcam microphone are limited.
Please do not confuse good with expensive. There are many microphones available at affordable prices, which you can easily connect via a USB port - this would suffice if this is your first time starting a twitch channel.
But when you want to take your streaming game to the next level and set up a studio - you have to think beyond USB connectivity. Microphones used in professional studios need an audio interface before you can use it with your PC.
However, setting a twitch streaming studio can be expensive. If you don't have a budget for it yet - a USB microphone will get the job done just as well.
Recommendation:
Behringer Xm8500:
- We want to suggest the Behringer xm8500, a cardioid microphone capable of selecting sounds produced in front of it, and this cards anything heard in the background.
- This microphone is priced between $20 and $25 and requires additional accessories to keep it steady.
Blue Yeti USB Mic:
- This microphone is priced at $129.99 and is ideal for streaming and other activities like podcasting.
- The device has four pickup patterns that you can select - stereo, bi-directional, cardioid, and Omni. You can choose a mode suitable for the task at hand.
- With an easy-to-use knob on the mic, you can toggle between multiple settings with ease.
Microphone Suspension Stand
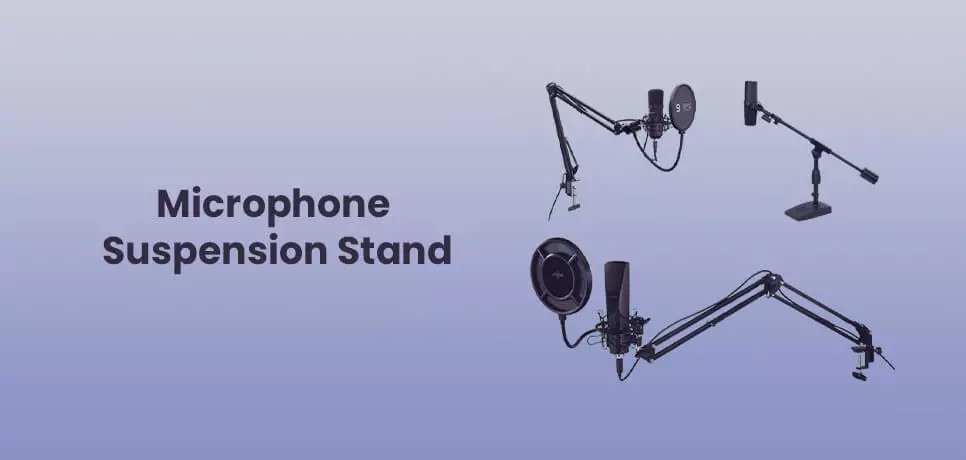
Please never keep your microphone in front of you on a desk - this can hinder the audio quality you capture.
When you broadcast your gameplay live, hundreds of thousands of people will see you. Trust me, coming off as unprofessional when you are getting started on Twitch is the last thing you want - which would exactly be the case if you constantly lean forward to speak into your mic.
Now that we got that out of the way, let's move on to our next problem. A microphone with a high gain will, without doubt, pick up sounds from the surroundings - cars passing, dogs barking, or people talking in another room. Your audience does not need to hear anything else besides your voice and the sound of your gameplay.
As you start streaming on Twitch, you need to get rid of the above problem. You can do that with the help of a microphone stand which you can place at the side of your desk. The frame is adjustable - you can keep it at an optimum position from your head so you can talk without problems.
Recommendation
Rode PSA 1
- Rode PSA 1 costs $112 and is the best overall microphone boom arm.
- It rotates 360 and reaches a maximum height of 32.5 inches horizontally and 33 inches vertically.
- This apparatus can hold a weight of up to 4.4 lbs and comes with its desk mountain feature.
- The swivel mount makes it easier to position the microphone at the right spot.
Knox Gear Professional Microphone Studio Stand
- This budget microphone stand costs 124.66 dollars and is made of high-grade steel that protects the arm from band breaks or cracks.
- The apparatus supports weight up to 5 lbs.
- It comes with a 360 degree rotational and two-axis swivel mount, which are adjustable.
A Pop-Up Filter
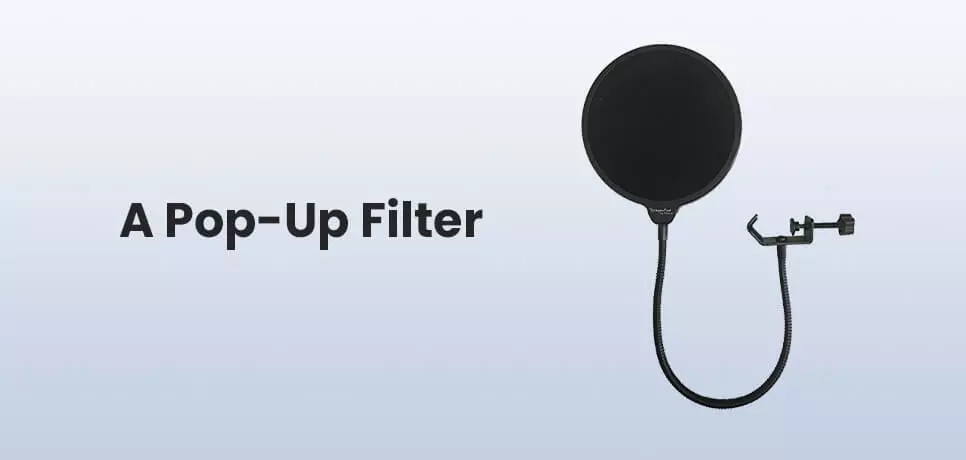
When we use certain letters from the alphabet in our speech, the air that flows from a mouth causes the volume to spike for a moment - resulting in the sound quality dropping. This is a recurring problem when a streamer uses a microphone without any covering.
With the help of a pop-up filter, you can minimize the spike in the frequency of your speech. Although the apparatus is easy to set up on your microphone, you may experience softened sounds while you speak. But this is much better than getting audio spikes when you start streaming on Twitch.
Recommendation:
Dragon Pad USA 6
- Dragon pad USA 6 is a pop filter with a 13-inch 360-degree gooseneck for better positioning.
- The filter is reasonably priced at $13
- The clamping mechanism incorporated is designed to hold multiple types of mic stand shafts without causing any damage.
- The dual-layer filter minimizes hard pops and plosives when the creator speaks.
Stedman Proscreen PS 101
- The Stedman Proscreen PS 101 is a metal pot screen designed by Stedman.
- The 4.6 inches metal screen filter directs the air away from the mic while keeping the sound as clean as possible.
- The 13° gooseneck can easily mix easier to position, and the clamp is designed to fit different mic stand shaft diameters.
Video Camera

Your audience needs to see everything when you interact with them. That means, besides looking at you, your viewers also want to see your reactions to unexpected occurrences during the gameplay. Hence, it would be wise to spend some money on an external webcam as in-build cameras lack quality and do not do justice to your audience.
The latest webcams available are created adhering to the needs of a streamer - allowing you to set up twitch stream in 1080p quality at 30 frames per second.
You can also step it up and record in 4K - but, on the downside, only your viewers with monitors that support 4K resolution display can enjoy your high-quality streams.
Pro tip: 1080p should be your ideal resolution for recording live stream sessions since most monitors today support this resolution.
Recommendation:
Canon Vixia HF R800
- Canon Vixia HF R800 is priced at around $250 and is one of the most pocket-friendly camcorders you will find in the market.
- The device is portable and durable. This video camera is ideal for beginners and comes with an in-built microphone.
Panasonic Lumix G7
- The mirror camera enables steamers to set up streams in 4K. You can up your video quality by interchanging between different lenses.
- This well-balanced video camera costs $500 and is an ideal choice if you want to make a career out of streaming.
Capture Card
You won't be needing this apparatus if you want to start streaming on Twitch from your personal computer. There are many software available that enable streamers to record their screen during the live gameplay.
Unfortunately, there is no such software available when you are a console gamer. Luckily, you have something called the capture card that makes recording twitch private live streams as easy as ever.
With the help of this card, you can record your stream in high solution, even when you are playing on consoles like Xbox One or PlayStation 5. All you need to do is attach this card to your computer via a USB port - followed by connecting your PC and your television to an HDMI port.
In our article, we have talked about various steps required to start streaming live. However, some methods can be complicated and may require the installation of specific software on your device. Hence, steamers who want to avoid unnecessary hassle during their twitch gaming setup can opt for external capture cards.
Recommendation:
Elgato Game Capture HD 60s
- Elgato game capture HD 60 years is priced at $188 and is supported on Windows, Mac, Xbox One, and PlayStation.
- This card captures high-quality images without lags and is portable.
Avermedia Extremecap U3
- This capture card will set you back by $169.99 and is compatible with Windows or Mac-powered computers and consoles like PlayStation, Xbox, or Wii.
- The key features of this product are its ultra-low latency and time shift features.
- Avermedia extreme cap u3 comes preloaded with plugins like Sony Vegas and Adobe premiere creative Studio 6.
Computer
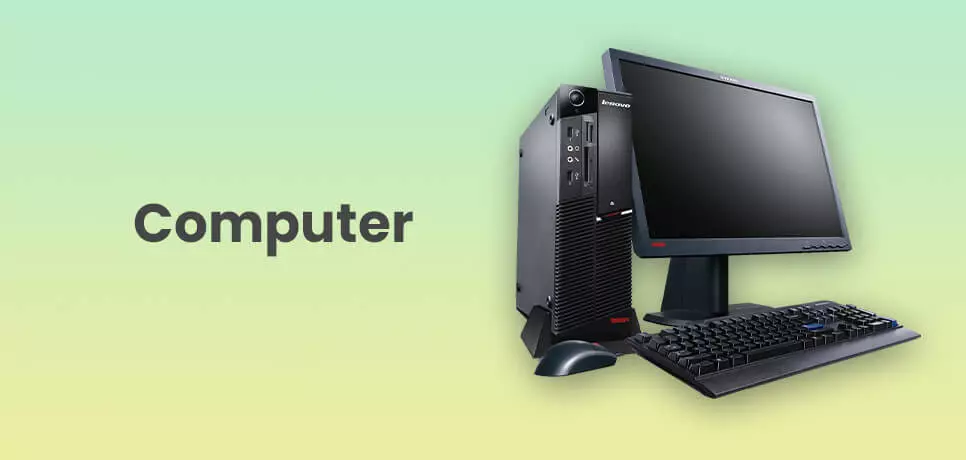
Professional streamers usually go with a two-monitor setup, where they broadcast the gameplay on the first monitor and the second screen to handle stream-related activities.
Playing and streaming are different tasks that, when performed on a single pc, can eat into your computer's limited resources; hence having two monitors is an excellent solution - although not recommended for twitch beginners.
New streamers want to keep the expenditure low; thus, they decide to play and stream on the same computer - but this comes with some drawbacks.
Firstly, you will see a significant performance drop in your gameplay and stream. Desktop with high-end specs can handle multiple activities, so you need to invest in a good computer.
Recommendation:
Alienware Aurora R10
- Powered by AMD Ryzen 73700 x processor, AMD Radeon RX 5700 XT 8GB GDDR 6 graphic card, 512 GB SSD storage, 16GB of ram, and 1TB of hard disk drive aura is one of the best laptops for twitch private live stream.
- The build of the computer is designed for better airflow.
- The legend ID feature can reduce CPU temperature by equally distributed in the air - this improves the stream performance through better stability and suitable frames per second video footage capture.
- The Aurora medicine is the first Alienware computer to include PCI express 4.0 technology which doubles the bandwidth are graphic cards for a better gaming experience.
Cyber PowerPC Gamer Supreme
- Another desktop on our recommended list is the CyberPowerPC gamer supreme which has an Intel Core i7 9700 k processor, NVIDIA GeForce RTX 2070 super 8GB graphic card, 16GB of ram, and 1TB of SSD.
- The computer has liquid cooling and a case panel made of tempered glass.
- With this computer, you can start streaming on twitch in 1080 p and with ARGB lighting and RGB mouse - look good while doing it.
Dual Monitor
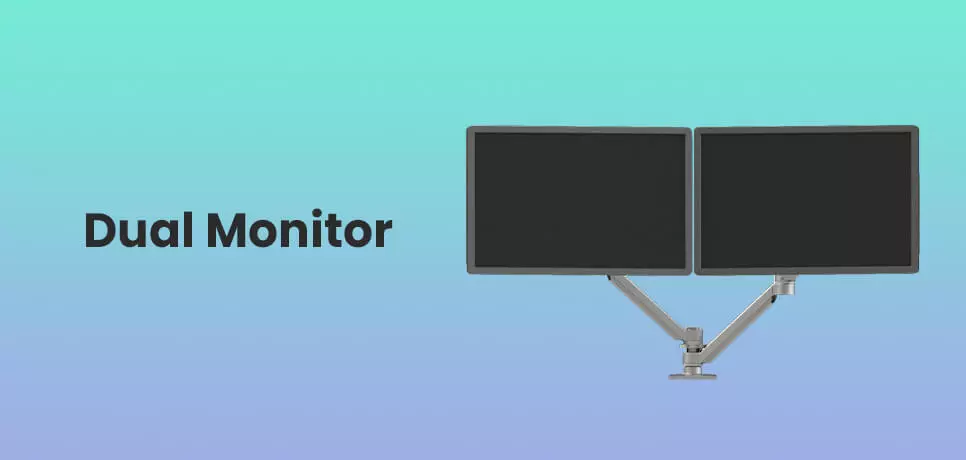
If streaming is your full-time occupation, you will soon realize that having a second monitor can be very handy.
Having a dual-screen gives you a lot of advantages. For starters, a second display is where you will communicate with your audience, make a transitional layout, modify audio and monitor everything related to your Twitch private live stream.
On the other hand, having only one monitor cuts your productivity in half and limits your ability to make changes to your live broadcast.
Your secondary monitor doesn't have to be high-end. However, the one you used to play games should.
A brand that wants to capitalize on the popularity of streamers can avail the services of a Top Influencer Marketing Platform in India.
We hope you have found valuable insights in the time spent reading this article.
Do share it with others.